Featured Post
Smart Living
- DIY guide: How to install a smart thermostat in your home

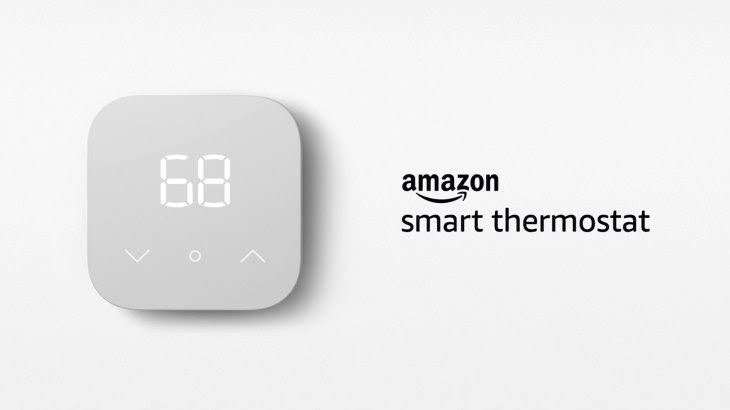
Installing a smart thermostat in your home can be a great way to save money on your energy bills, as well as increase the overall comfort of your home. With a smart thermostat, you can control the temperature of your home remotely, schedule temperature changes, and even track your energy usage. However, the process of installing a smart thermostat can seem daunting for those who are not familiar with home wiring. In this guide, we will walk you through the process of installing a smart thermostat in your home, so that you can start enjoying the benefits of this technology as soon as possible.
Before you start the installation process, there are a few things you will need to check and prepare:
- Compatibility: Make sure that the smart thermostat you have chosen is compatible with your current HVAC system. Most smart thermostats will work with most HVAC systems, but it is always best to double check before purchasing.
- Tools: You will need a screwdriver, wire stripper, and wire nuts for the installation process.
- Wi-Fi: Make sure that your smart thermostat is connected to a Wi-Fi network, as this is necessary for remote control and monitoring.
Step 1: Turn off the power to your HVAC system Before you begin the installation process, it is important to turn off the power to your HVAC system. This can typically be done by turning off the breaker switch in your electrical panel.
Step 2: Remove your old thermostat Remove the cover of your old thermostat and take a picture or write down the wire connections. This will be helpful when connecting your new thermostat. Carefully remove the thermostat from the wall, making sure not to damage any of the wires.
Step 3: Connect the wires to your new thermostat Match the wires from your old thermostat to the corresponding wires on your new thermostat. Use wire nuts to connect the wires together. If your new thermostat has a “C” wire, and your old thermostat did not, you will need to install a new “C” wire.
Step 4: Mount the new thermostat Mount the new thermostat onto the wall, making sure that it is level. Use the screws and anchors provided with the thermostat to secure it in place.
Step 5: Power on the HVAC system Turn the power back on to your HVAC system and test the thermostat to make sure it is working properly.
Step 6: Connect to Wi-Fi Follow the manufacturer’s instructions to connect your new thermostat to your home’s Wi-Fi network. This will allow you to control and monitor your thermostat remotely through a smartphone or tablet.
By following these steps, you should now have a fully functional smart thermostat in your home. Enjoy the benefits of being able to control the temperature of your home remotely, schedule temperature changes, and track your energy usage. If you encounter any issues during the installation process, don’t hesitate to reach out for help or consult the manufacturer’s support.
- A beginner’s guide to creating a smart home on a budget

Creating a smart home can seem like an expensive and daunting task, but it doesn’t have to be. With a little bit of planning and research, you can create a smart home on a budget that meets your needs and fits your lifestyle. In this guide, we will walk you through the process of creating a smart home on a budget, so that you can start enjoying the benefits of this technology as soon as possible.
Step 1: Determine your needs The first step in creating a smart home on a budget is to determine your needs. Think about which aspects of your home you would like to automate and control, such as lighting, heating, and security. Consider which features are most important to you and your lifestyle, and make a list of the devices and systems you will need to achieve your goals.
Step 2: Research your options Once you have a clear idea of what you need, start researching your options. Look for devices and systems that offer the features you need at a price you can afford. Make a list of the products that you are interested in, and compare their features and prices.
Step 3: Prioritize your purchases After you have researched your options, prioritize your purchases. Start with the devices and systems that are most important to you and your lifestyle, and work your way down the list. This will help you to stay within your budget, while still getting the features and functionality that you need.
Step 4: Shop around When it comes to purchasing your smart home devices, shop around to find the best deals. Look for sales and discounts, and consider purchasing used or refurbished devices to save money. Additionally, consider buying devices that are compatible with multiple smart home platforms, so you can easily integrate them with other devices in your home.
Step 5: Start small Creating a smart home on a budget doesn’t have to be an all or nothing proposition. Start small by automating one or two devices or systems in your home, and then expand your smart home as your budget allows.
Step 6: Seek for alternatives Some smart home devices can be replaced by alternatives that are more affordable. For example, you can use smart power strips to control multiple devices at once, instead of buying individual smart plugs. Another alternative is using voice assistants like Google Assistant or Alexa, to control your smart home devices.
By following these steps, you can create a smart home that meets your needs and fits your budget. Remember that creating a smart home is an ongoing process, and you can always add new devices and features as your budget allows. The most important thing is to start small and gradually build your smart home over time.
Creating a smart home on a budget requires careful planning and research. One of the most important steps is to determine your needs and the features that are most important to you and your lifestyle. Once you have a clear idea of what you need, you can start researching your options and comparing features and prices.
When it comes to purchasing your smart home devices, shopping around is essential to find the best deals. Look for sales, discounts, and consider buying used or refurbished devices to save money. Additionally, consider buying devices that are compatible with multiple smart home platforms, so you can easily integrate them with other devices in your home.
Another way to save money is by seeking alternatives to expensive devices. For example, instead of buying individual smart plugs, you can use a smart power strip to control multiple devices at once. Another alternative is using voice assistants like Google Assistant or Alexa, to control your smart home devices, eliminating the need for a separate hub or controller.
To make the process of creating a smart home on a budget more manageable, start small and gradually build your smart home over time. This will allow you to stay within your budget while still getting the features and functionality that you need. Remember that creating a smart home is an ongoing process, and you can always add new devices and features as your budget allows.
Another way to save money is by buying in bulk. Some companies offer package deals where you can purchase multiple devices at a discounted price. this is a great way to save money if you’re planning to automate multiple rooms in your home.
Lastly, stay informed about new products and promotions by subscribing to newsletters and following smart home manufacturers on social media
- DIY guide: How to install a smart thermostat in your homeInstalling a smart thermostat in your home can be a great way to save money on your energy bills, as well as increase the overall comfort of your home. With a smart… Read more: DIY guide: How to install a smart thermostat in your home
- A beginner’s guide to creating a smart home on a budget
 Creating a smart home can seem like an expensive and daunting task, but it doesn’t have to be. With a little bit of planning and research, you can create a smart home… Read more: A beginner’s guide to creating a smart home on a budget


